6. User Management in Jenkins with Role-Based Access Control (RBAC)

"Hello, I'm Kiran Pawar, a passionate Cloud and Devops Engineer with a strong background in cloud automation, configuration, and deployment. My journey in the world of technology has been a thrilling adventure, where I've had the privilege to work with cutting-edge tools and practices.
🚀 As a DevOps Engineer:
I specialize in automating, configuring, and deploying instances in cloud environments and data centers. My expertise extends to DevOps, GitOps, CI/CD pipeline management, HashiCorp Terraform, and containerization. I'm proficient in AWS and Linux/Unix administration, ensuring robust infrastructure and application performance.
🔧 My Tech Stack:
Front-end skills: HTML, CSS, SCSS, Tailwind CSS, Bootstrap, React, Material-UI, JavaScript DevOps toolbox: GIT, OWASP,Nexus,Trivy, Github, Gitlab, Terraform, Ansible, Docker, Kubernetes, Helm, Jenkins, Prometheus, Grafana, Argo CD, AWS EKS.
🌐 My Cloud Expertise:
I have hands-on experience managing AWS services, including EC2, S3, EBS, VPC, ELB, RDS, IAM, Route53, and more.
🔒 Networking and Security:
My skills include managing networking concepts such as TCP/IP protocols, security policies, and subnet interfacing. I have a strong understanding of infrastructure and networking, covering topics like firewalls, IP addressing, DNS, and more.
💡 What Sets Me Apart:
I bring a positive attitude, a strong work ethic, and a collaborative spirit to every project. I'm a self-starter, a fast learner, and an effective team player with strong interpersonal skills. In addition to my DevOps skills, I've developed shell scripts (Bash) for automating tasks and have proficiency in Python scripting. My ability to communicate and manage projects, along with a track record of resolving client issues, adds value to every team I work with. If you're looking for a DevOps engineer who is also well-versed in front-end technologies, feel free to connect with me. Let's explore new possibilities and create exceptional technical solutions together!"
Introduction
In Jenkins, user management with Role-Based Access Control (RBAC) allows you to define specific permissions for users and groups. This helps control who can access certain features, run jobs, or make changes to configurations. In this tutorial, we'll demonstrate how to manage users and assign roles using Jenkins.
1. Create a New User in Jenkins
Step 1: Create a New User
To start with, you need to create a user. Here’s how you can create a new user:
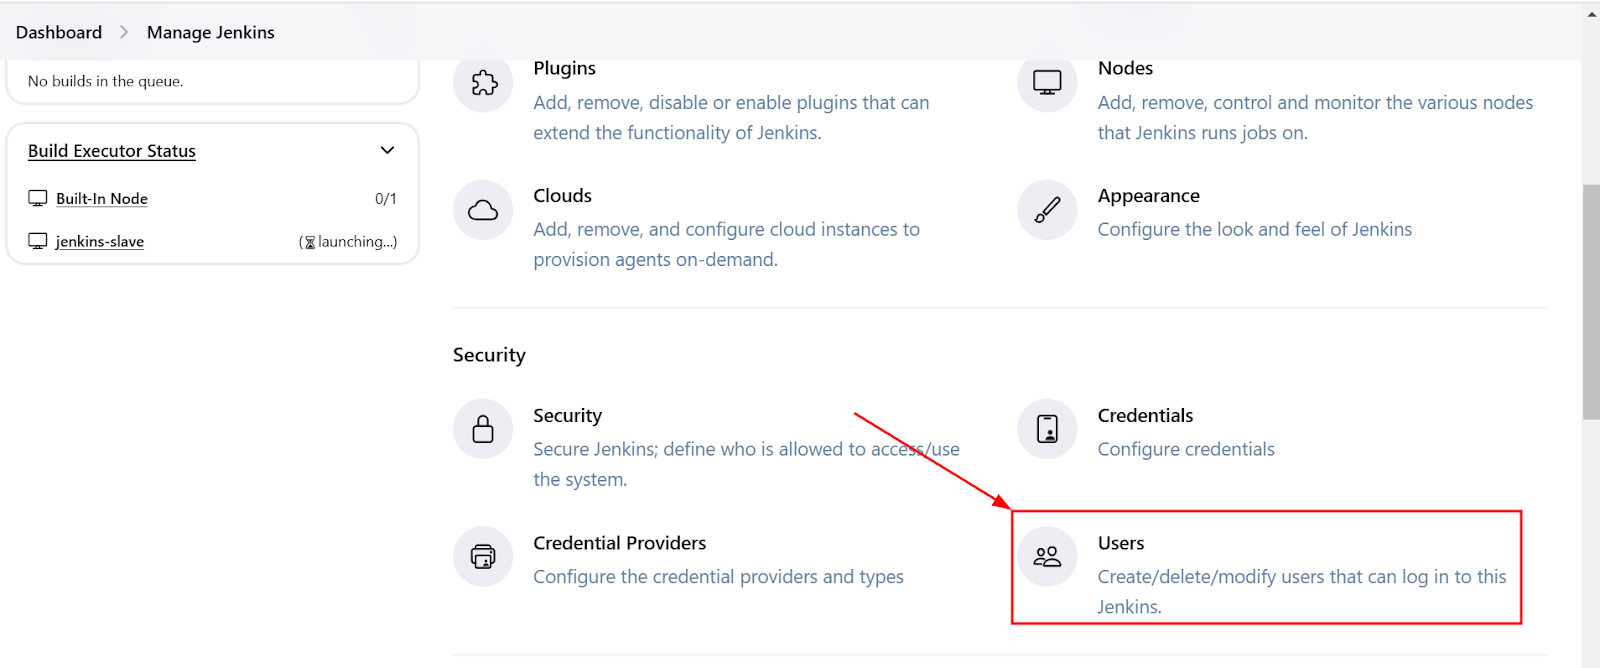
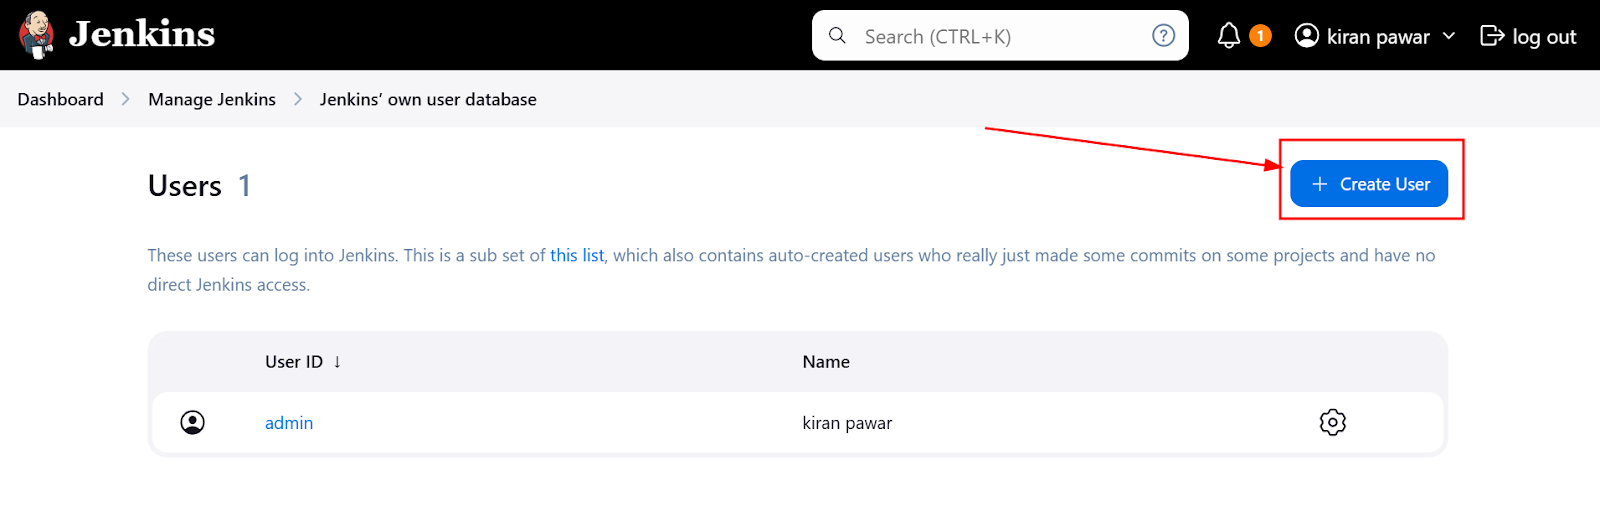
Go to Manage Jenkins → Manage Users.
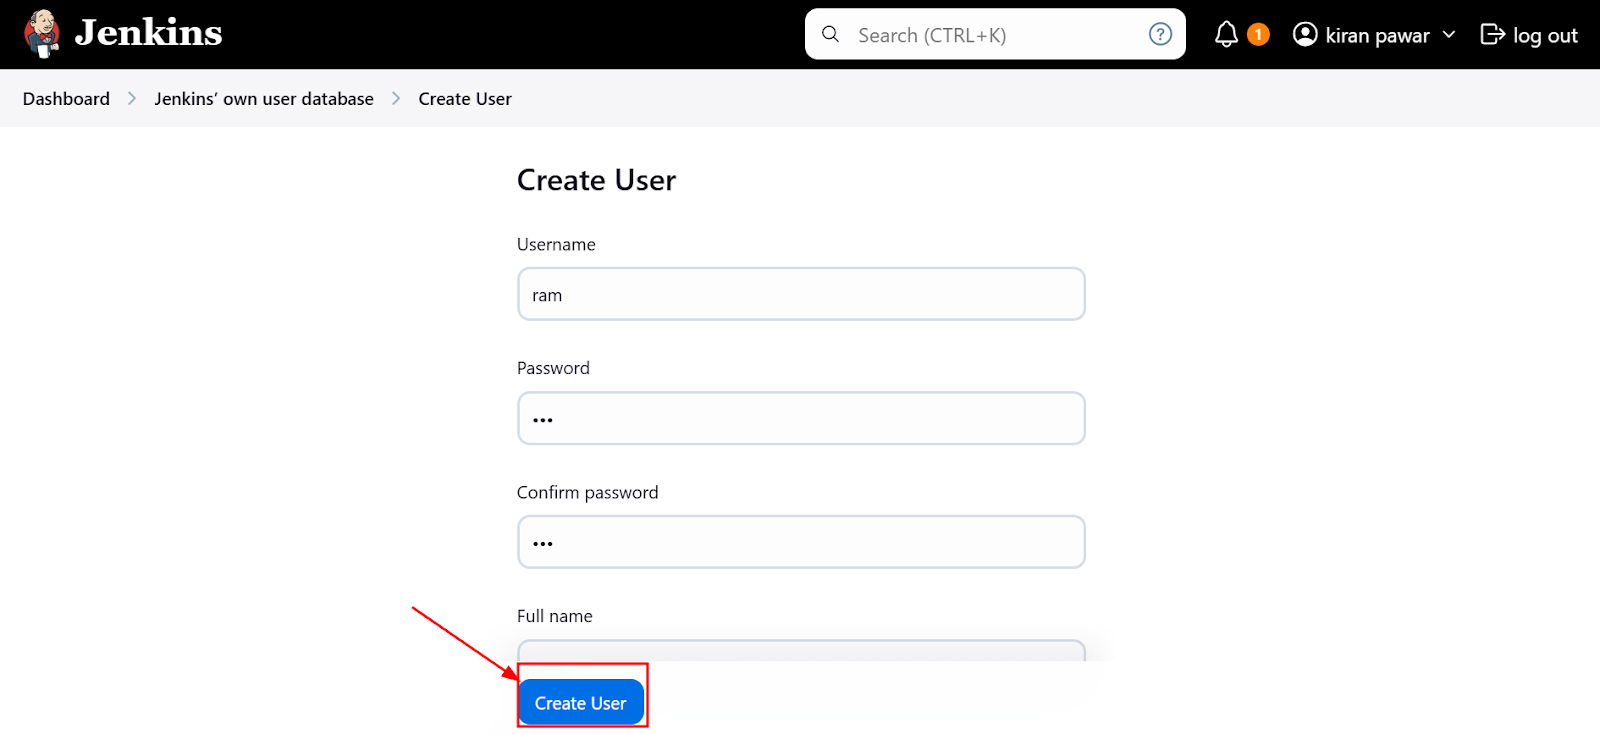
Click Create User and provide the following details:
Username: ram
Full Name: Ram
Password: [Choose a password]
Confirm Password: [Confirm the password]
Email Address: [Provide email address]
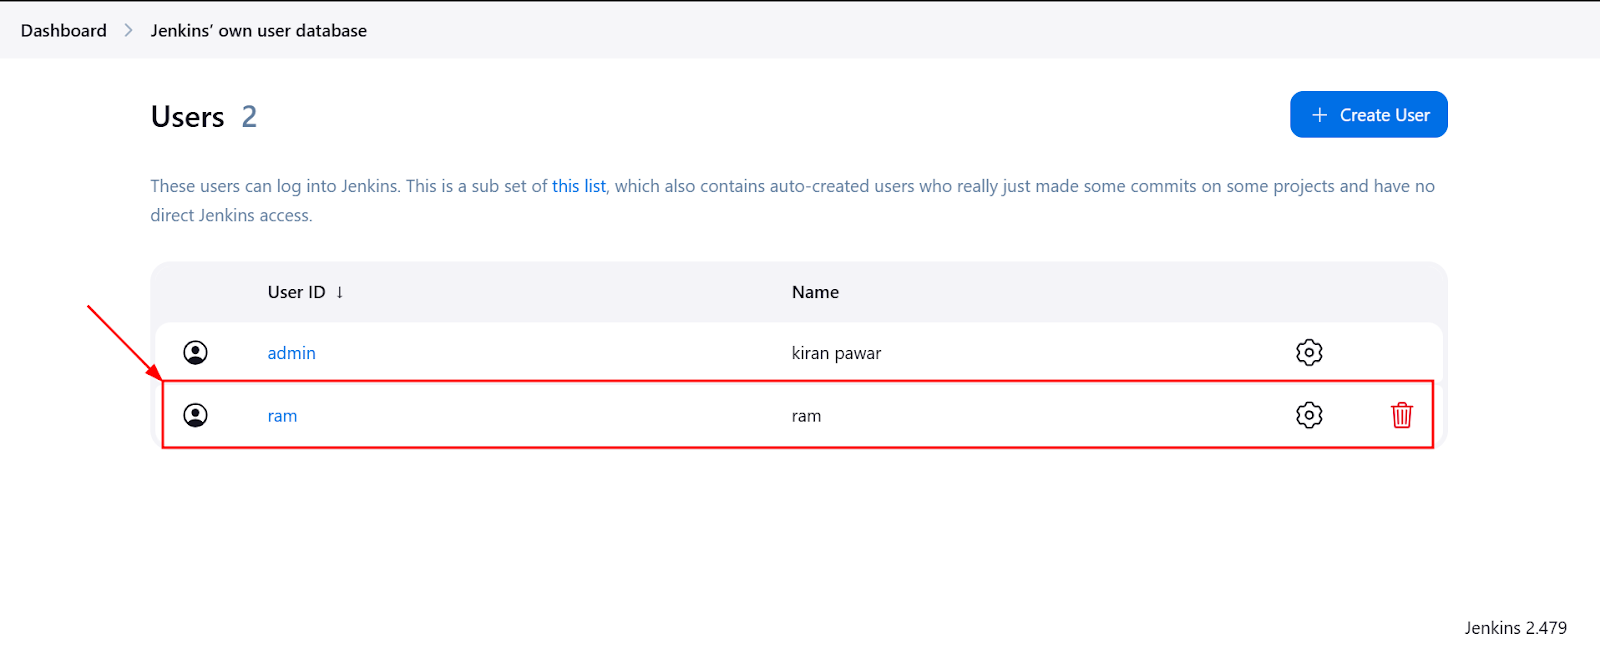
Click Create User to save the new user.
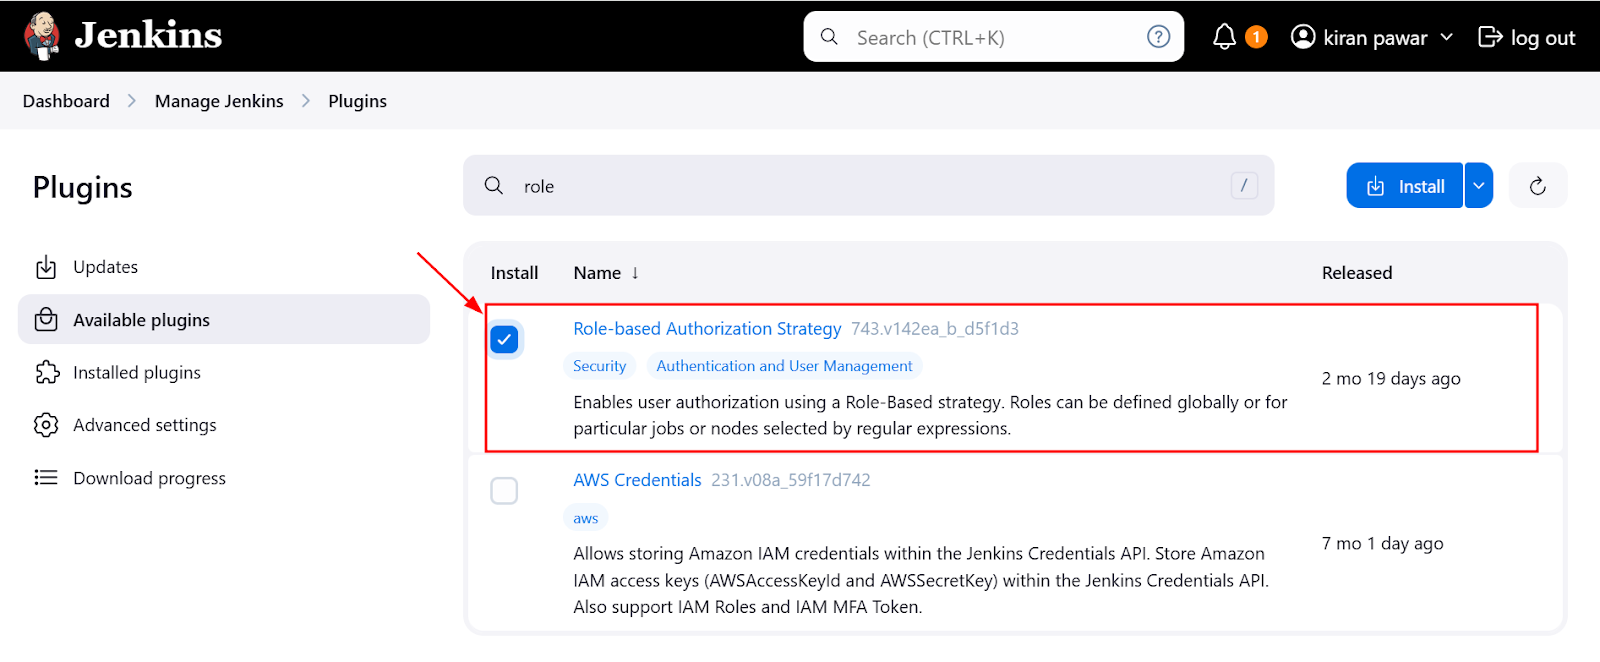
2. Install the Role-Based Authorization Strategy Plugin
Now, to enable Role-Based Authorization, you need to install the Role-Based Authorization Strategy plugin.
Step 1: Install the Plugin
Go to Manage Jenkins → Manage Plugins.
In the Available tab, search for Role-Based Authorization Strategy.
Select the plugin and click Install without restart.
Once the plugin is installed, Jenkins will be able to support role-based user management.
3. Configure Role-Based Authorization
After installing the plugin, we need to configure the roles and assign them to users.
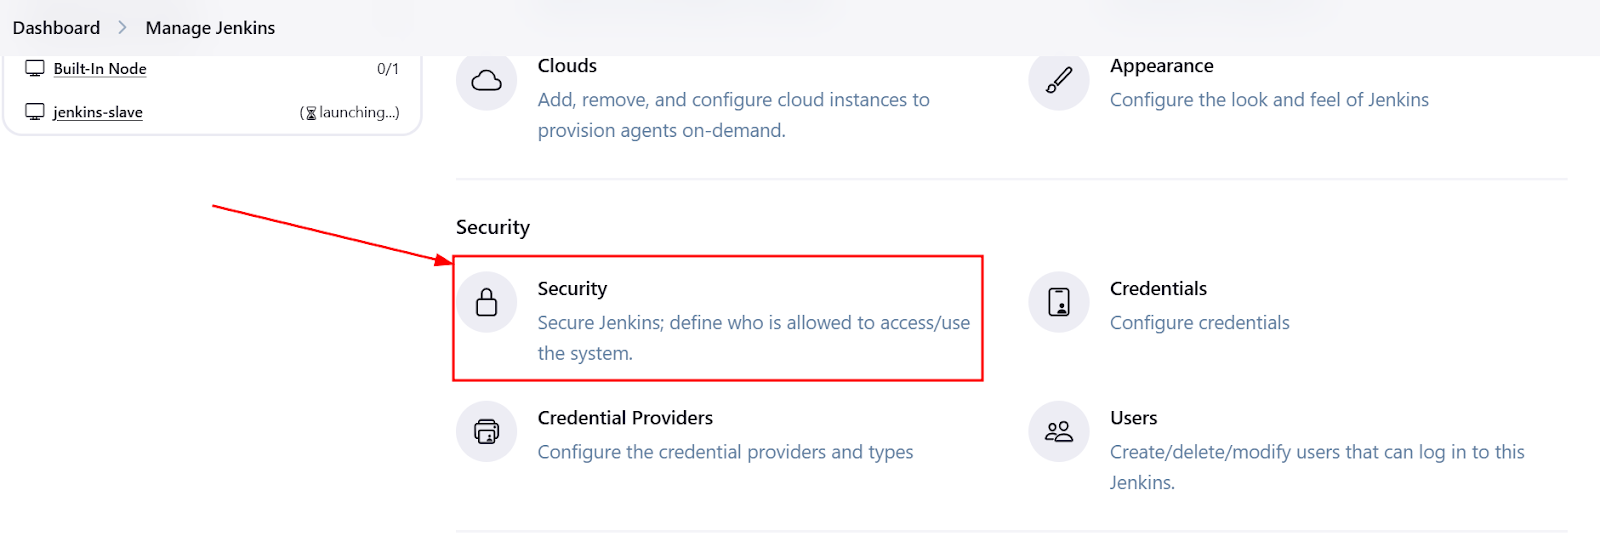
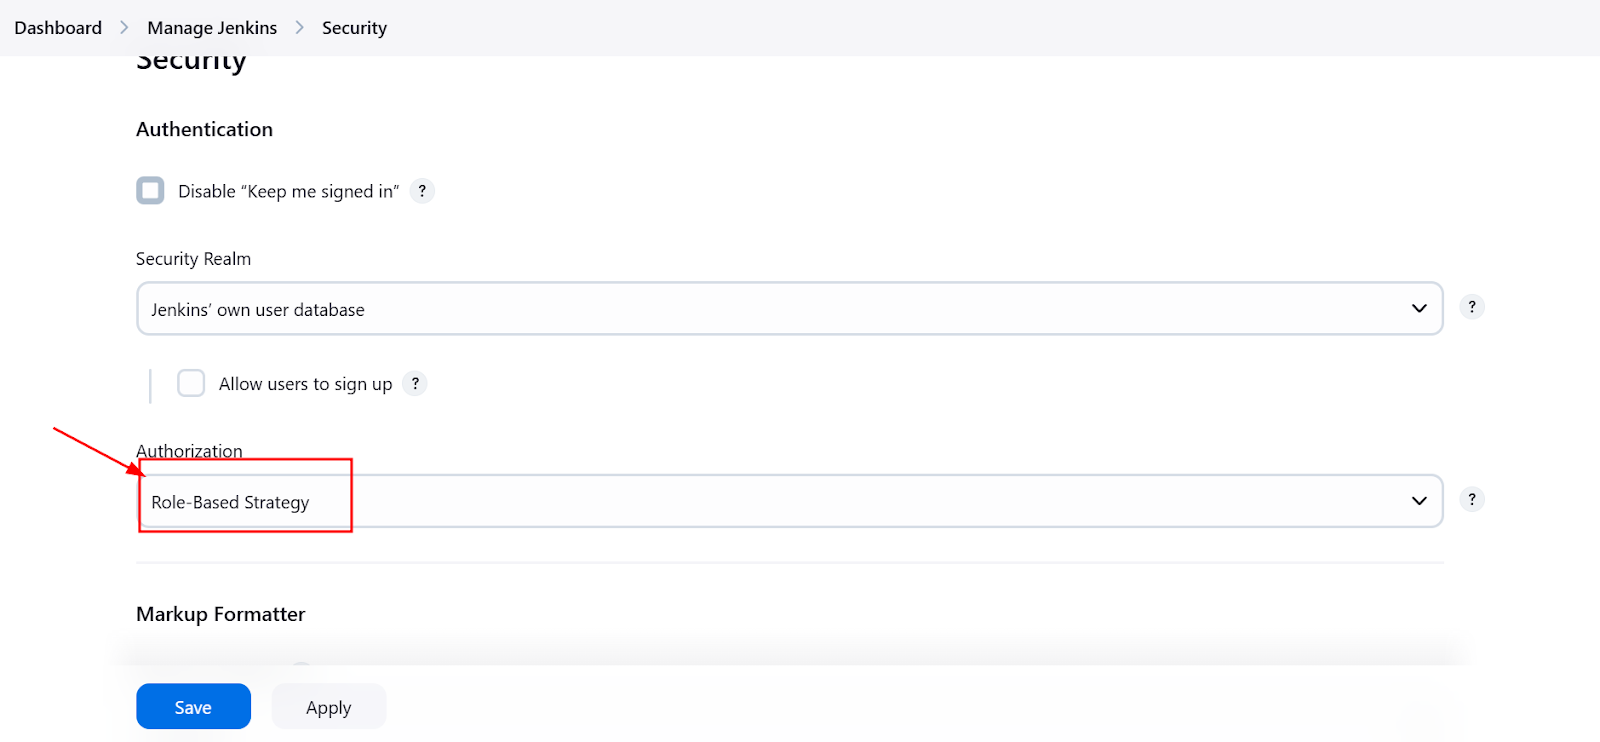
Step 1: Set Authorization Strategy
Go to Manage Jenkins → Configure Global Security.
Scroll down to Authorization and select Role-Based Strategy.
Save the changes.
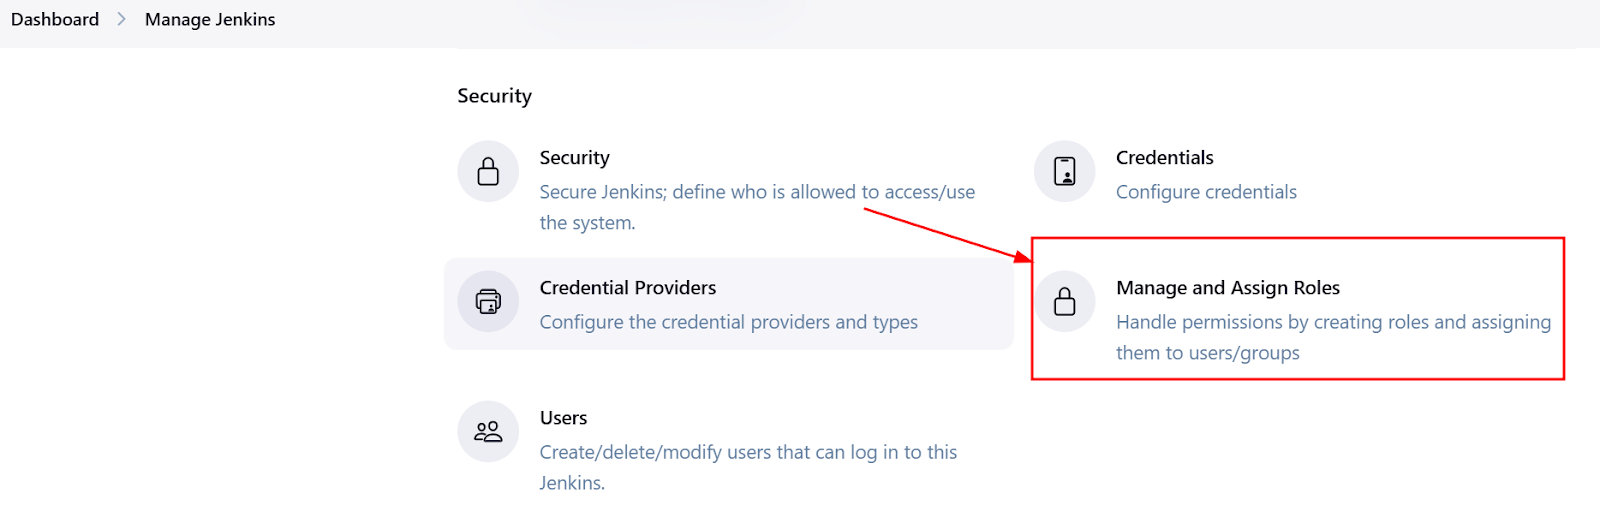
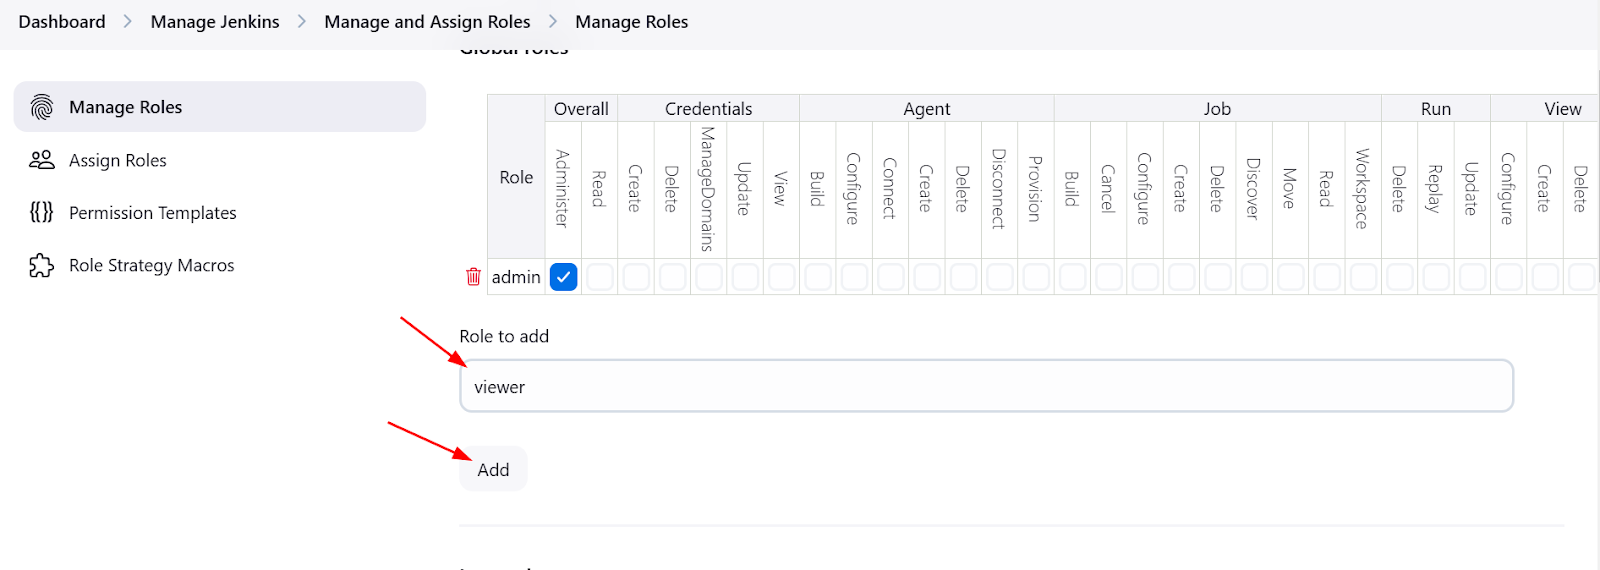
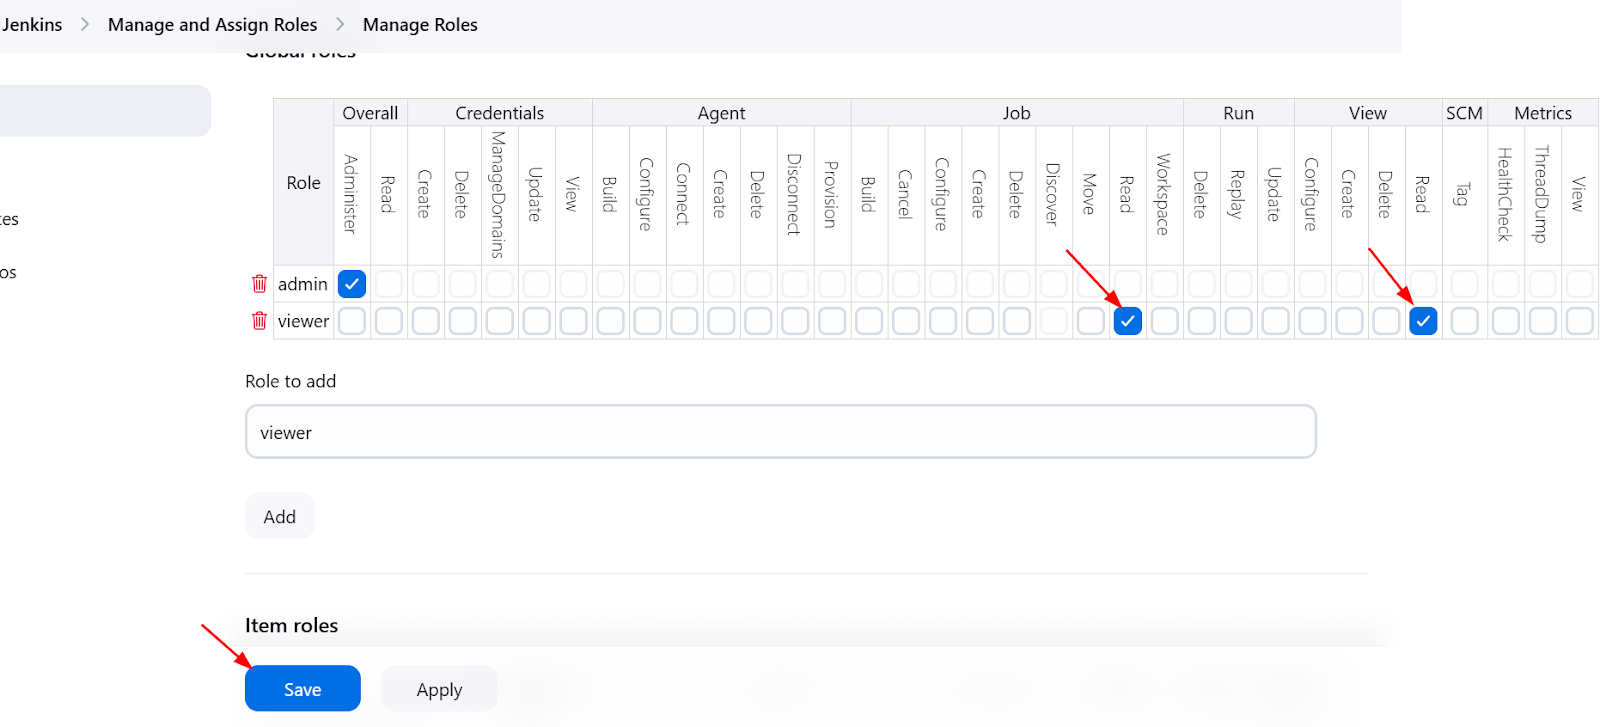
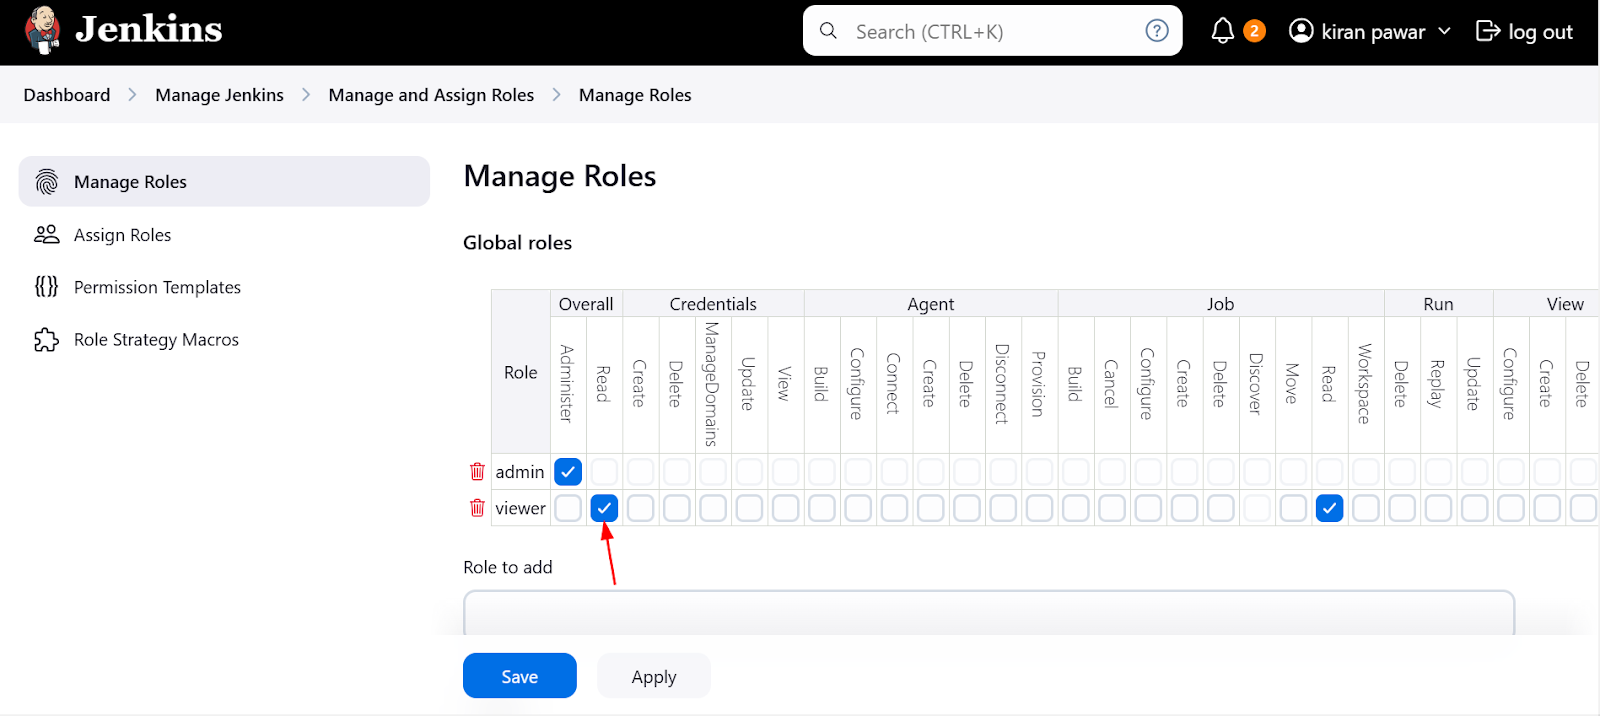
Step 2: Configure Roles
Go to Manage Jenkins → Manage and Assign Roles → Manage Roles.
Here, you can create roles for different users based on your requirements. For example:
Admin Role: Can access all configurations and execute all jobs.
User Role: Can only execute jobs but cannot modify configurations.
To create a new role, click Add Role and provide a name (e.g.,
adminoruser).Assign the appropriate permissions to each role (e.g.,
Job/Build,Job/Configure,Job/Read).
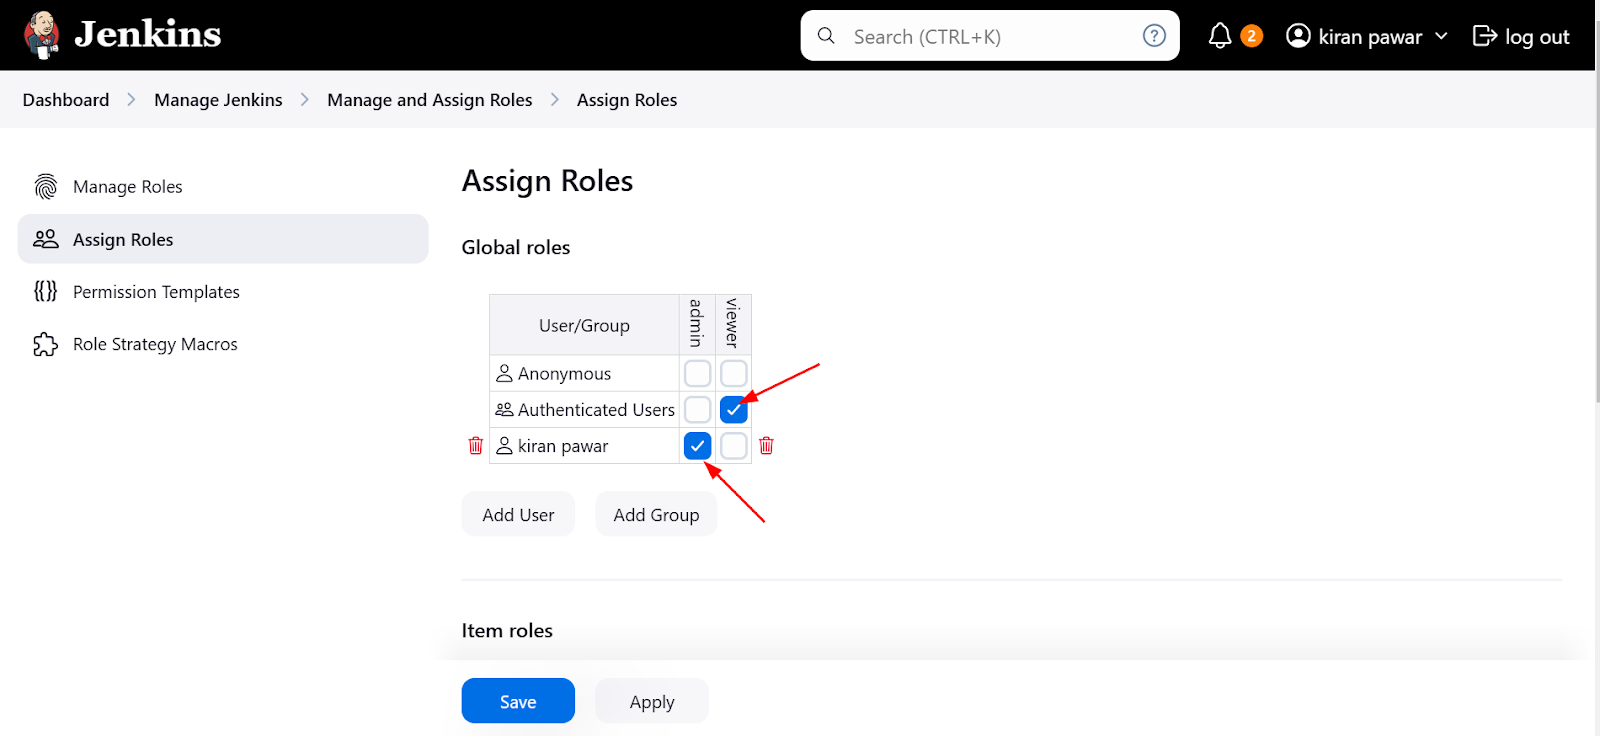
4. Assign Roles to Users
Once the roles are created, you can assign them to users.
Step 1: Assign Roles to Users
Go to Manage Jenkins → Manage and Assign Roles → Assign Roles.
You will see the list of users created in Jenkins. Here, you can assign a role to each user.
For example, assign the
adminrole to the userramto give full access or assignuserrole for limited access.
Login with User ram
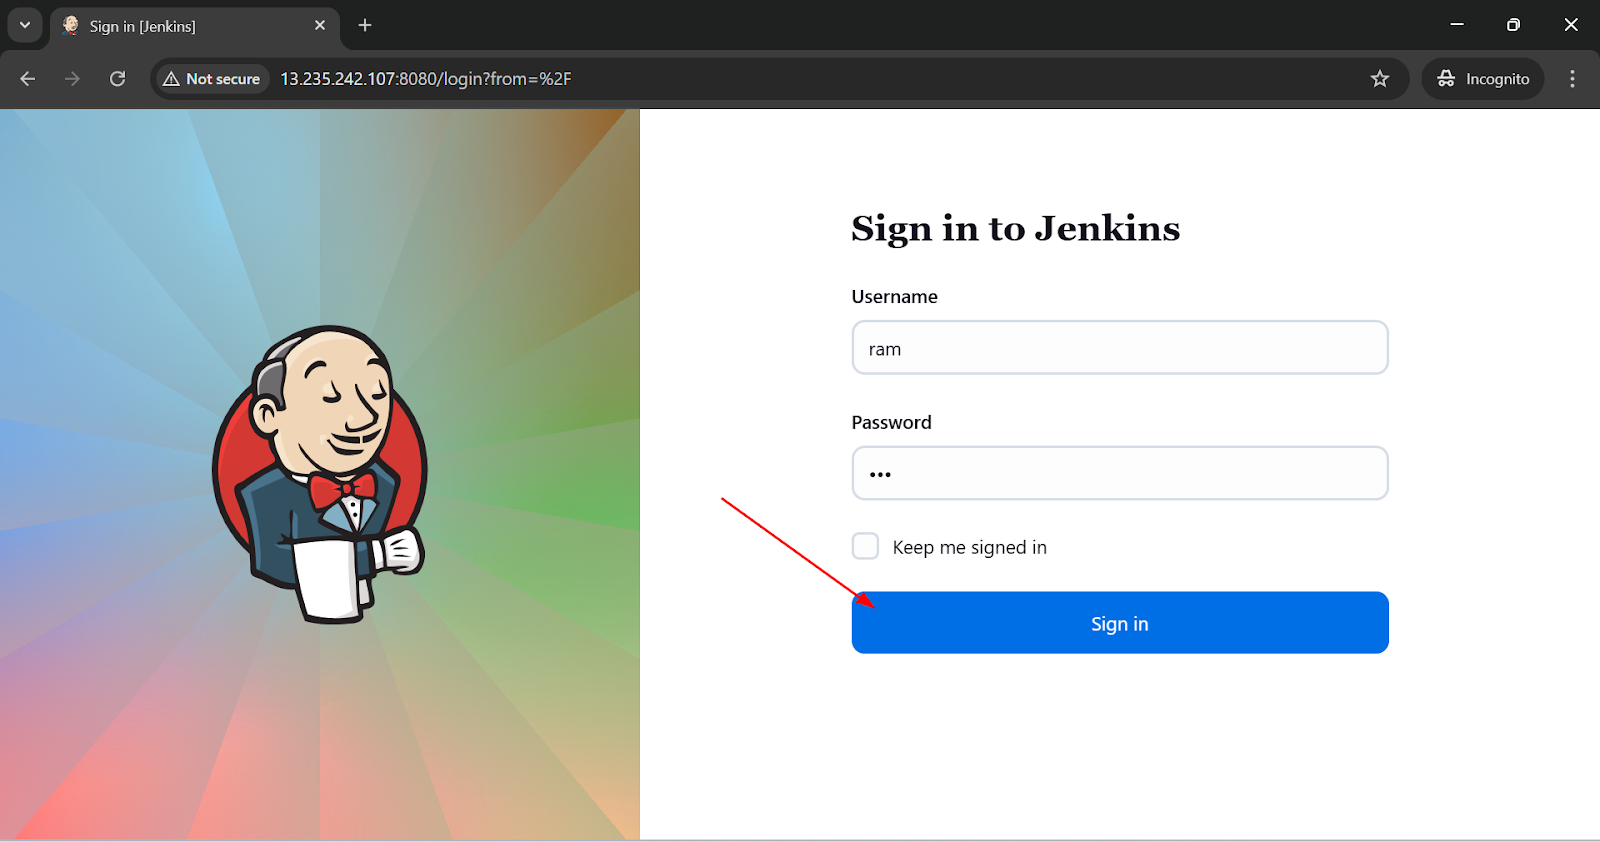
Ram is unable to access dashboard because we have set authenticated user job read option
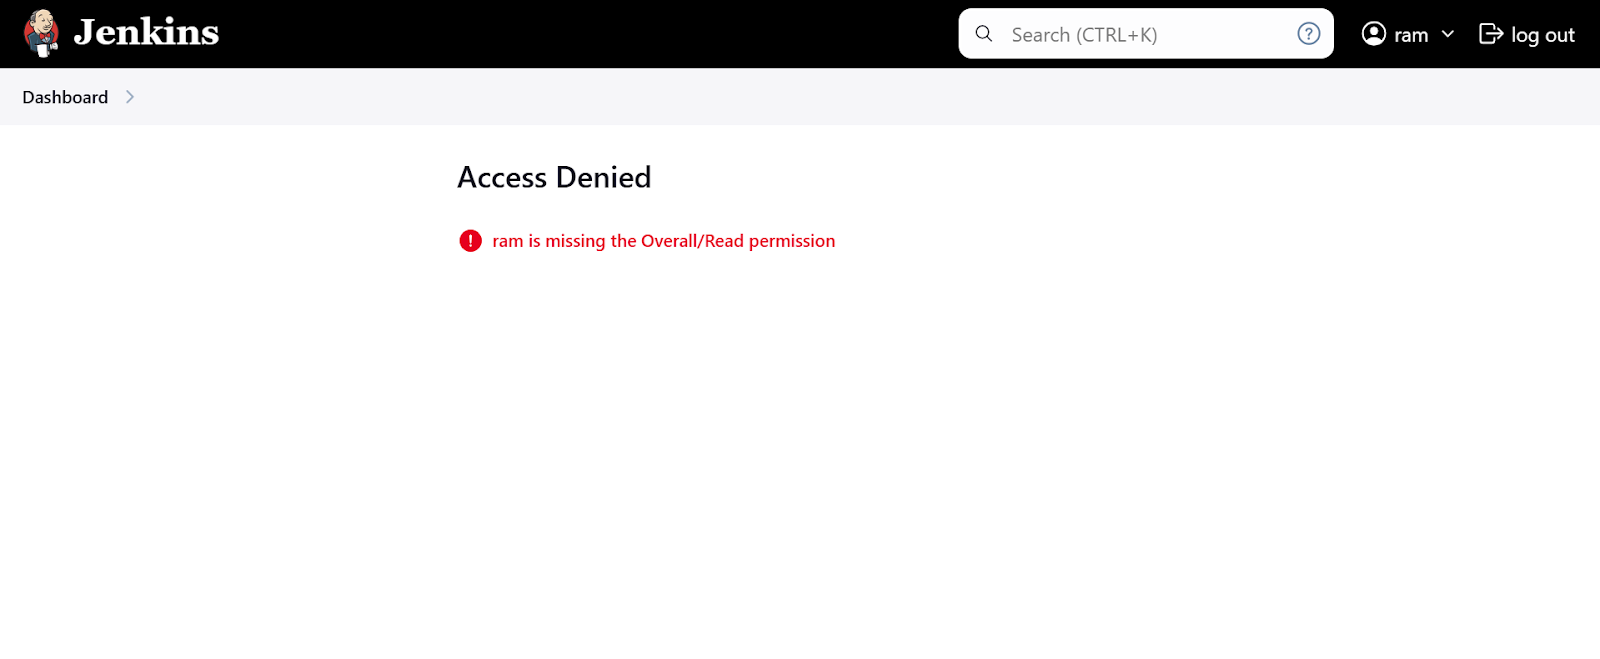
Go to manage roles and give ram user overall read access
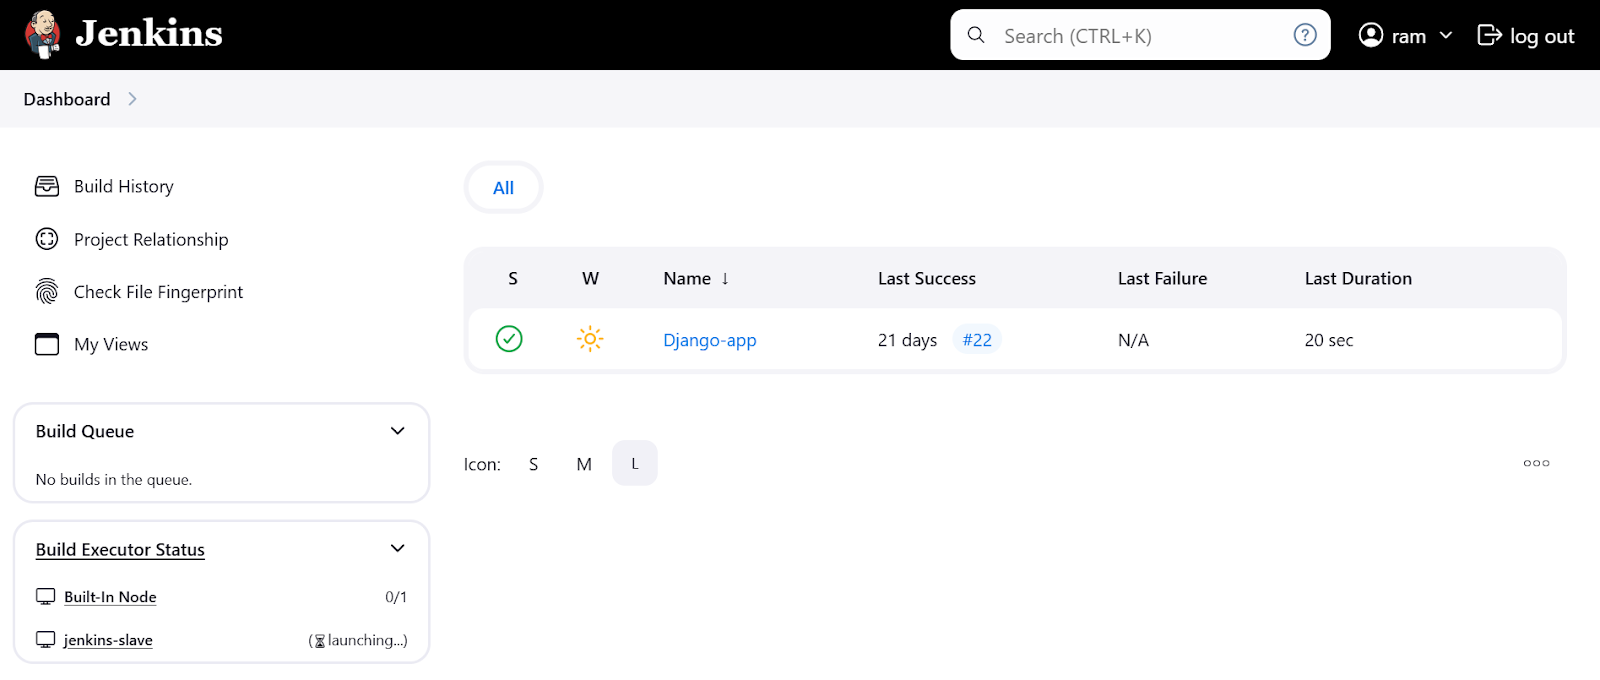
Now Ram will be able to see jenkins dashboard
5. Conclusion
By setting up Role-Based Access Control (RBAC), you can efficiently manage user permissions in Jenkins. This helps improve security by ensuring that users have the right access level based on their responsibilities.
🚀 Next Steps:
Add more roles and permissions as required for different projects and users.
Regularly review and update roles and permissions as your Jenkins setup evolves.
Consider integrating LDAP or Active Directory for centralized user management.
Let me know if you need further adjustments or if you'd like to add more details!
